Construction and installation steps of steel structure workshop

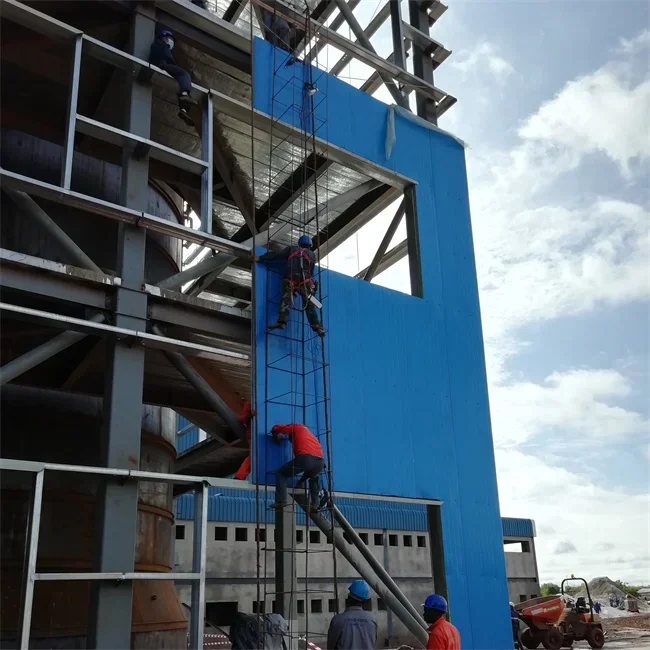
With the development of the steel structure industry, there are many types of steel products and their practicality has gradually improved. Therefore, steel structure workshops have been gradually used in various major industries. The steel structure workshop includes: embedded parts, columns, beams, purlins, supports, braces, and tiles. These parts have different uses and can maintain the normal operation of the steel structure workshop. Today FASECbuildings will explain steel to you. Structure workshop construction and installation steps.
Installation steps 1. Factory foundation
The foundation of the steel structure workshop is constructed by a professional civil engineering team. After the foundation short column steel bar binding and formwork support are completed and reinforced, the project department immediately sends professional technicians and construction personnel to embed the steel structure bolts. In order to ensure the installation quality of the superstructure, it is also necessary to work closely with the civil construction unit and check together. When pre-embedding, the position and extension length of the anchor bolts, the level and elevation of the foundation support surface, etc. must be strictly controlled.
Installation steps 2. Steel columns and steel beams
Steel columns and steel beams are processed in the factory and installed directly on site. To install steel columns, you need to find an elevation. The elevation needs to be the same size. After lifting it up according to the drawing, align the sole plate with the anchor bolts, and then secure it with screws on the spacers. Usually steel After the columns are installed, they need to be adjusted uniformly.
Installation steps 3. Tie rod
After the columns are installed, start connecting the tie rods. They will be very secure after installation. Quickly connect the beams with tie rods. The high wall bolts on both sides will not work. Once the tie rods are connected, the protection will be better.
Installation steps 4. Navigation beam
At present, many factories have crane beams, which are relatively simple to make. They are hoisted and placed on the corbels, and then the anchor bolts are fixed. After adjustment, the welding begins.
Installation steps 5. Purlins
Purlins are generally divided into C-shaped steel, Z-shaped steel, etc. There are requirements for the spacing between columns and the load-bearing capacity of the roof. Nowadays, factory buildings will have 8 meters or 12 meters. If the spacing is too large, Z-shaped or C-shaped steel can be used instead and extended. The roof purlins are usually lifted up by a crane, and then the workers spread out the eight purlins and then fasten the screws.
Installation steps 6. Pull strips
After the purlins are installed, you need to install tie bars. The purpose of the tie bars is to prevent the purlins from deforming. If the purlins are deformed, nails will not be installed on the purlins when the boards are built later. The nails on the wall will not be in a straight line, which will affect the appearance.
Installation steps 7. Horizontal braces
Horizontal standards are common to factory buildings. They need to provide flexibility for beams and beams, and between wall columns and pillars. This type of wall is more difficult to install.
Installation steps 8. Gutter/drainage
Gutter sinks are mostly made of stainless steel. Exposed items are exposed to wind and rain every day. If they are not made of this material, they will easily rust. Nowadays, a gutter bracket is welded under the factory building to worry about the heavy rainfall in the early days and the heavy load of the water tank.
Installation steps 9. Maintenance
It is necessary to install roof panels and wall panels, which are generally divided into composite panels, which are 75 and 100 thick, so that the insulation will not be cold in winter and will not be exposed to the sun in summer. The nails on the wall should be driven straight, making it beautiful and elegant.
Installation steps 10. Doors, windows, water and electricity, fire retardant coatings

Installation steps 11. Completion acceptance
The last step of the steel structure workshop installation is completion acceptance. According to the design drawings and construction plans, check whether the construction meets the design requirements to ensure the safety of the steel structure workshop.
When FASECbuildings conducts steel structure workshop construction and installation, all installation steps are strictly carried out in accordance with rules and regulations, paying special attention to the safety and quality of installation.
Steel Structure Factory Construction - FASECbuildings
FASECbuildings focus on the 2D/3D Modeling Design & Construction of various steel framed buildings, structural steel construction and building-related products supply like glass windows/doors, glass curtain walls etc.
Under support of structural giant KNSN Group, FASECbuildings received a lot of foreign projects from project Engineering, Fabrication, Construction, Logistic and Installation Guidance etc. and become more professional in foreign project operation, specially in US-EU standard engineering and project management aspects.
KNSN Group is an extra grade enterprise of China?s steel structure manufacturing, has the Grade I professional contracting qualifications in terms of steel structure, Grade B special design of steel structure, Grade?qualifications in terms of general contracting of house building and Grade ? professional contracting qualifications in terms of groundwork, foundation work and the mental window and door engineering.
Please contact us for your steel structure workshop design and construction solutions, we assure that our products will satisfy your needs with designs, competitive performance price ratio and best services.
Lena
Trueland1589@outlook.com

